
 |
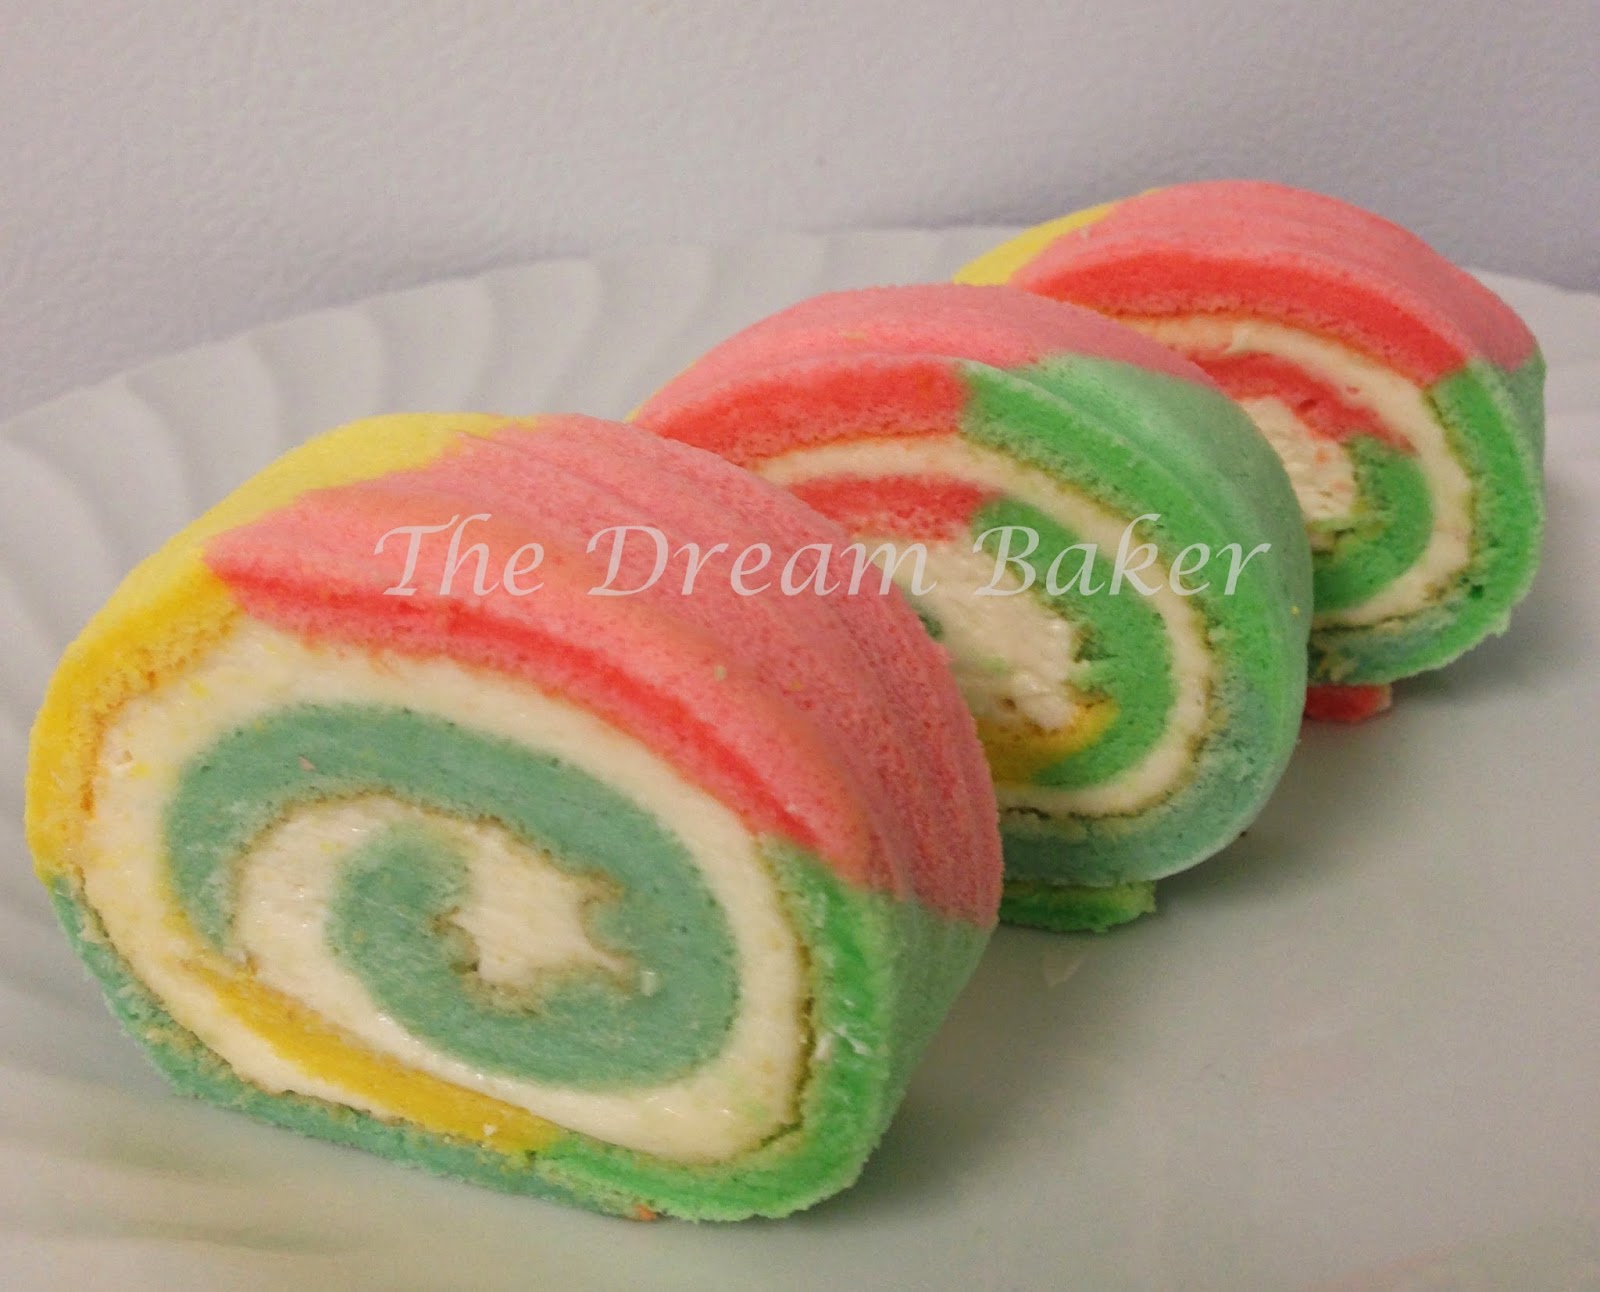
| MultiColour-Striped Swiss Roll with Vanilla Buttercream |
I am submitting this MultiColour-Striped Swiss Roll with Vanilla Buttercream Filling to the Aspiring Bakers #40: Rainbow and Ombre Party! (March 2014) hosted by Cynthia of The Baking Biatch.
MultiColour-Striped Swiss Roll with Vanilla Buttercream
Ingredients Required
Swiss Roll
Recipe referenced and modified from: 袅袅烘培香
Group A
3 egg yolks
15 grams granulated sugar
60 ml water
40 ml vegetable oil
1/4 teaspoon pure vanilla extract
80 grams low protein flour
Group B
3 egg whites
50 grams granulated sugar
1/4 teaspoon cream of tartar
Edible food colourings, as desired
Vanilla Buttercream Filling
Recipe referenced and modified from: The Food Network
1 cup confectioners' sugar
1/2 cup (113 grams) butter, at room temperature
1/2 teaspoon pure vanilla extract
1 tablespoon heavy whipping cream
Bakeware Used
Two baking sheets with dimensions 15.25"x10.25"x0.75"
(The source recipe for the swiss roll recommends 28-cm by 28-cm square baking pan)
Preparation Steps
My Last Baking Post Submission for Aspiring Bakers' Theme Event Afterthoughts
It has been a challenging and fulfilling month. I have submitted a total of 12 baking posts and only hope that all qualifies for the theme event. I strongly believe that hard work pays off, and in my case what I have achieved is a great sense of satisfaction. A big thank you to all who have been supporting and reading my blog. I will continue and strive to keep my blog alive!
Dare to dream.
The Dream Baker
Ingredients Required
Swiss Roll
Recipe referenced and modified from: 袅袅烘培香
Group A
3 egg yolks
15 grams granulated sugar
60 ml water
40 ml vegetable oil
1/4 teaspoon pure vanilla extract
80 grams low protein flour
Group B
3 egg whites
50 grams granulated sugar
1/4 teaspoon cream of tartar
Edible food colourings, as desired
Vanilla Buttercream Filling
Recipe referenced and modified from: The Food Network
1 cup confectioners' sugar
1/2 cup (113 grams) butter, at room temperature
1/2 teaspoon pure vanilla extract
1 tablespoon heavy whipping cream
Bakeware Used
Two baking sheets with dimensions 15.25"x10.25"x0.75"
(The source recipe for the swiss roll recommends 28-cm by 28-cm square baking pan)
Preparation Steps
- Grease one baking sheet and line with parchment paper extending up from two ends of the baking sheet. Set aside.
- Place the other baking sheet in the lower rack of the oven and fill with water to 2/3 full.
- Preheat oven at 375 degrees F.
- In a large bowl, beat egg yolks using an electric mixer. Add sugar (from Group A) and continue whisking until mixture becomes thick and pale yellow.
- Stir in water and oil, followed with vanilla extract. Whisk until incorporated.
- Add sifted flour to egg yolk mixture and whisk till well combined. Set aside egg yolk batter.
- In a separate large bowl, beat egg whites and cream of tartar using an electric mixer until foamy.
- Add sugar gradually and continue beating until egg white reaches stiff peaks form.
- Using a spatula, gently fold the egg white meringue in thirds to the egg yolk batter until batter is well combined.
- Divide batter into four equal portions. Add one to two drops of desired food colours to each divided batter. Fold until colours is evenly combined.
- Using a spoon, scoop and spread coloured batter alternately in the baking sheet in a diagonal fashion.
- Once finished, gently tap baking sheet against table top to release any large air bubbles.
- Place baking sheet on the rack above the water bath in the preheated oven and bake for approximately 15 minutes (baking time varies with different oven). Cake should be done when cake springs back when pressed gently. If not, go with the traditional toothpick method where you know the cake is baked through when you insert a toothpick into the cake and the toothpick comes out clean.
- Remove baking sheet from oven. Transfer cake by lifting parchment paper from baking sheet and place on wire rack. Set aside to cool for approximately three to five minutes.
- Invert the cake to a clean parchment paper and carefully peel off parchment paper from the cake.
- Invert the cake again on another clean parchment paper with the slightly brown surface facing upwards.
- Gently roll the cake along with the parchment paper and set aside to cool completely.
- Once the cake has been cooled completely, unroll the cake. Spread filling evenly on the entire cake up to one-inch away from the furthest end of the cake.
- Re-roll the cake without the parchment paper. Wrap rolled cake with cling wrap and refrigerate with end side of cake down till filling is set. Keep refrigerated for at least 30 minutes or longer.
- To serve, remove cling wrap and trim off both ends of the swiss roll. Slice into desired thickness.
- In a large bowl, mix together butter and sugar using an electric mixer. Mix on low speed until well blended and increase speed to medium and beat for another 3 minutes.
- Add vanilla extract and whipping cream and continue to beat on medium speed until mixture reaches spreadable consistency.
The Dream Baker's Experiment
- I used cake flour for this recipe.
- I used eggs at room temperature which weighed between 62 grams to 64 grams (with shell on).
- I used a baking sheet instead as I did not have the recommended size baking pan. Noticed that the cake layer appeared thinner than my previous baking experiment.
- The source recipe did not call for baking in a water bath but I decided to do so anyway since my previous baking experiments on swiss roll baked in a water bath turned out well.
- I have combined certain prepping steps with my previous baking experiences on swiss roll as this source recipe did not detail as much.
- I baked the cake layer for 13 minutes.
 |  |
Before and after the swiss roll was baked.
This is the first time I have tried making a diagonally-striped swiss roll. Noticed I wasn't too skilled in laying the batter. I was also "lazy" in measuring the batter equally and had eye-balled the batter division. @_@
This is not as "cakey" as my previous Polka Dots Swiss Roll with Nutella® Buttercream because the baking pan used was too large for the amount of batter, thus the cake layer has been spread thinner. The ingredients required in both recipes were also slightly different. Perhaps I should do a comparison in the ingredients used to determine how each ingredient properties affects the outcome of the cake. Baking is a science after all.
It has been a challenging and fulfilling month. I have submitted a total of 12 baking posts and only hope that all qualifies for the theme event. I strongly believe that hard work pays off, and in my case what I have achieved is a great sense of satisfaction. A big thank you to all who have been supporting and reading my blog. I will continue and strive to keep my blog alive!
Dare to dream.
The Dream Baker
No comments:
Post a Comment